DIY Gold Wreaths (and Christmas in the Kitchen)
- Jennifer Laura
- Dec 16, 2020
- 3 min read
I've been putting wreaths on everything this year. Our mirror in the front room, our windows in the living room, and the mirrors in the main bedroom (I'm hoping to photograph that room decked out for Christmas soon). So when I was looking at the kitchen and wondering what it needed...of course I realized I wanted to add wreaths. But I didn't want to do the same simple green faux wreaths I have everywhere else (although I do love those). I wanted to create something a little different and save some money too- I didn't want to spend $100 on this project and I knew buying wreaths would get me close to that at $25-$30 per wreath. I hunted around on Pinterest for some inspiration and found these wreaths which was the perfect starting point for this project! So let's get into how I made these easy DIY gold Christmas wreaths!

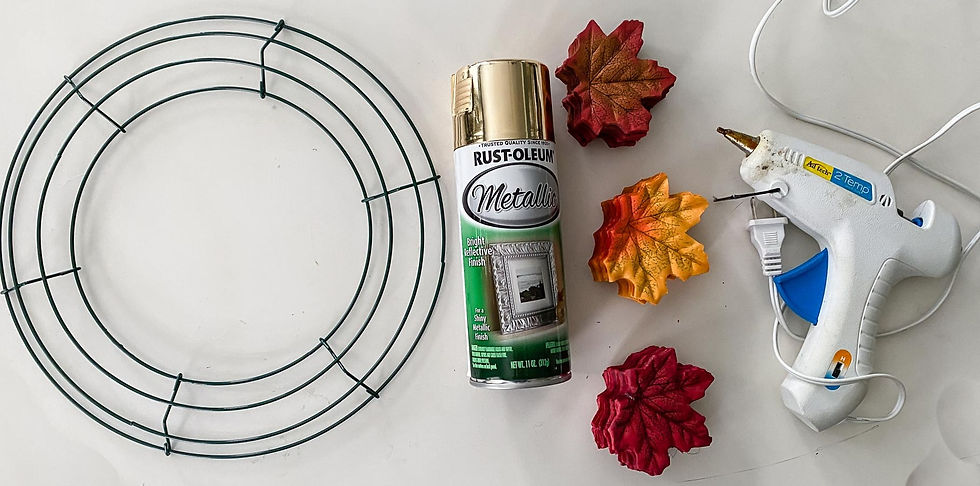
Supplies:
- 12" wreath forms (I bought a pack of five, but only used three)
- faux leaves (linked is a pack of 1000 and I probably used about 75 leaves per wreath, so if you can find a smaller pack do it!)
- hot glue gun and glue sticks
- some ribbon to attach your wreaths (I used this pretty blue velvet) I had leftover from our staircase)
*I bought everything I needed for this project on Amazon and to make three wreaths my total came in right under $25 (not counting the hot glue I used since I always seem to have tons of hot glue sticks on hand).

Tutorial:
This project was so easy and to make three wreaths it took me a little over an hour. The first thing I did was spray paint my leaves gold, this was the hardest part because it happened to be a windy day, the leaves are paper thin and very lightweight and kept blowing away so I used a rock to hold them down while I sprayed each one.

Even still, it didn't take too long to get a nice big batch of gold leaves. I would paint about 20-30 leaves, take a break and work on assembly, then go back to collect the leaves when they dried, spray another batch, and so on. The leaves dried quickly and had this pretty matte finish that I really liked. To assemble the wreath I just put a big triangle of hot glue on the back of each leaf and stuck it onto the wreath form.


I wanted all of my leaves to overlap so you couldn't see where any of them started. Each "row" got two leaves and I worked my way around the form hot-gluing them all on top of each other.

From there I just worked my way around the wreath form to completely cover it. It took me about 15 minutes to glue all of the leaves for each wreath (or three Taylor Swift songs).


Once they were completely covered it was time to hang them up! I used this dusty blue ribbon to hang them on our cabinet fronts and I am obsessed with how they look- simple and elegant, but they make the entire kitchen feel like Christmas.

You can also see the gingerbread houses we made last weekend.

We will probably make some more houses with graham crackers in the next week or so. That's always one of my favorite holiday activities and we usually have TWO gingerbread building parties- one with our neighborhood friends and one with our family...and this year we're obviously having neither.

I also popped a few faux presents behind the glass cabinets to add some cheer too. I did this last year and thought it was a fun touch. These are actually the same packages, it's truly a miracle one of the kids didn't rip into them before I had a chance to put them back up! I had to constantly remind them that they were fake and didn't have anything inside them- haha! I also have this little shelf on the other side of our kitchen decorated- which I've shared previously.

It's probably one of my favorite spots in the house to "style".

Let me know what you think of the wreaths and- and if you give this project a try I would LOVE to see how it turns out. Be sure to tag me on instagram or facebook!
Want to see more?
Here's our entryway and front room decked out for Christmas this year.
Here's our Christmas decorations from last year.


Comments